
In this blog, I’m going to show you how you can create your first virtual machine with VMware. But before that, I want to make sure that you have already read the previous blog that I have posted. In the previous part of this series, we downloaded multiple ISOs of operating systems such as Windows Server, Windows 11, and Kali Linux. I also showed you how you can install a virtualization software (VMware).
If you don’t know what I’m talking about, I want you to go to the previous part of this series and just go through it. Okay, enough talking. I’m assuming that you have gone through the previous blog that I posted, and now have the VMware software and the related ISOs already downloaded on your system.
- The First Look at VMware
- Creating Your First Virtual Machine with VMware
- Setting up VMware Hardware Compatibility
- Selecting the Operating System For Virtual Machine
- Naming Your Virtual Machine
- Configuring TPM and Encryption
- Selecting the Firmware of VM
- Virtual Machine CPU Configuration
- Virtual Machine Memory Configuration
- Virtual Machine Network Configuration
- I/O Controller and Disk Type
- Setting up Virtual Disk
- Naming your Virtual Disk
- Finishing Up
The First Look at VMware
At first, the virtualization concept and the thought of creating your first virtual machine might seem a little complex, but in reality, it is really, really simple. Below, you see the image of the virtualization software VMware that we are using for creating the virtual machines.

All you have to do is just click on the create a new virtual machine Button right in front of the home screen of VMware.
Creating Your First Virtual Machine with VMware
Right after clicking the create a new virtual machine button, you will see a pop-up just like below :
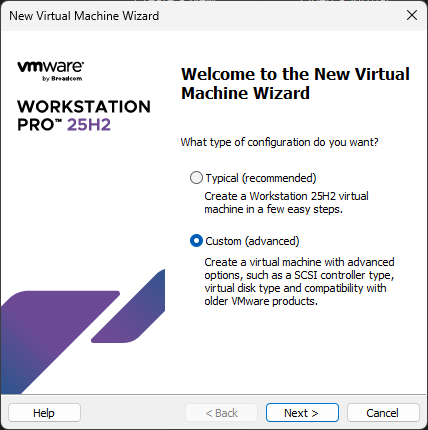
Now it’s really up to you which type of configuration you want to choose. The typical install is much easier but provides less flexibility and options to tweak around. The custom install, on the other hand, is much more flexible and provides you with much more options to play with. Okay, so I’m going to go with a custom install because I want to show you everything that you might see while creating a new virtual machine.
It’s okay if you choose a typical installation configuration because it is easier, and I would prefer the typical installation if I were a newcomer.
Setting up VMware Hardware Compatibility
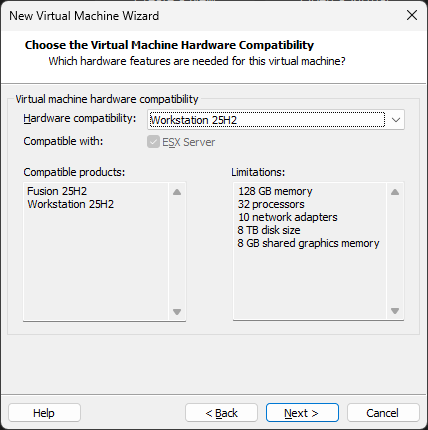
After you choose the installation type, you will see the versioning dialogue box appear. As you can see above, it is nothing but just a compatibility function of VMware that allows you to work with previous versions of the software itself. What it is actually useful for is upgrading your virtual machines from a previous version or creating a virtual machine that might support the previous version on another computer.
For now, we do not have to worry about this thing at all because this is a fresh installation, and you are going to create your first virtual machine. We do not give a damn about the previous versions of VMware, right?😂
Selecting the Operating System For Virtual Machine
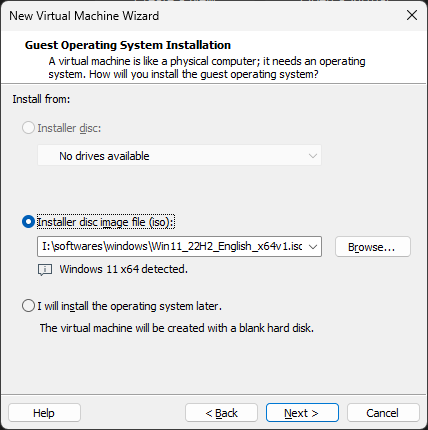
Now we are getting to some serious stuff here !! What you see above is the dialogue box for selecting the iso that you are going to use for creating the virtual machine. Now choose whatever the iso you want for your virtual machine. You can install a Windows Server 2025, Windows 11 or Kali Linux.
In the previous part of this series, I already showed you how you can download these ISOs ( in case you don’t know where to get these ISOs 😊).
Naming Your Virtual Machine
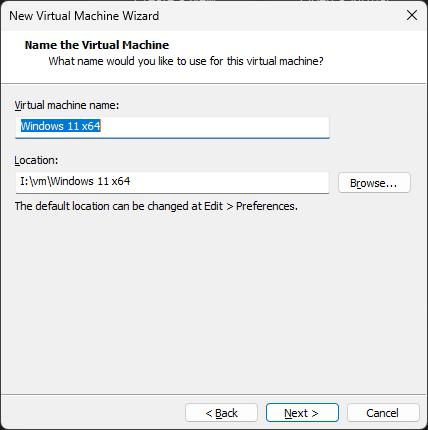
Now you can name your virtual machine. Whatever name you want to give, just give it hahhahahah 😆.
Configuring TPM and Encryption
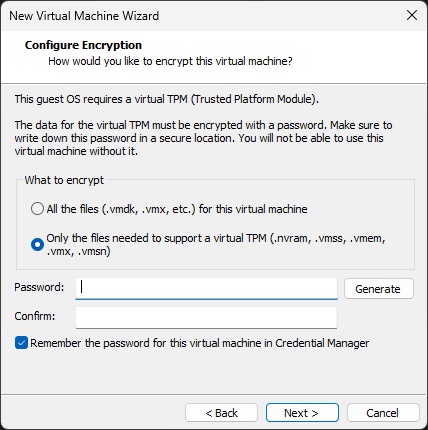
If you know some things about Windows 11, you might have heard about the term TPM. Now, in reality, the TPM is actually a hardware component that is installed on your motherboard, but in virtual machines, we don’t have that, so we actually have a virtual TPM 😂😂.1
Particularly, Windows 11 requires you to have a TPM module on your machine, so in the above dialogue box, what we are actually going to do is set up a password for our virtual TPM module.2 What this is actually going to do is encrypt your virtual machine. So whenever you open the virtual machine, you will have to again put the password that you entered in this dialogue box.
Just type a simple password that you can remember and move on to the next Step.
Selecting the Firmware of VM
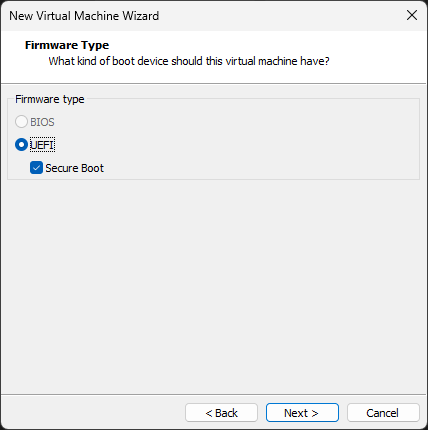
Now we are going to choose the firmware type. The BIOS option is turned off by default, because modern operating systems don’t support BIOS as a firmware. It’s been replaced with UEFI. You will also see an option of Secure Boot; it’s optional, but recommended when you are going to be installing Windows 11 because there is a requirement of Secure Boot in the specifications of the Windows 11 operating system.
Virtual Machine CPU Configuration
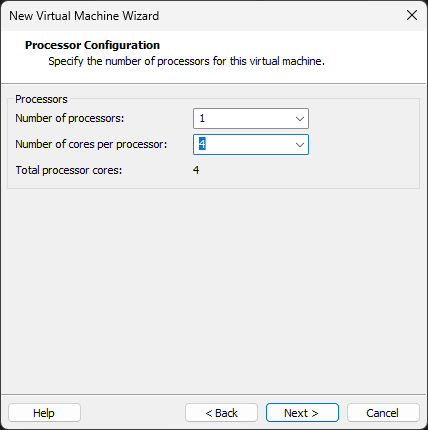
Moving on with the installation, you will see the processor configuration options. As you can see above, we can modify the number of processors and cores in each processor. My preferred configuration is one processor and four cores, as you can see in the above image, but you can have your own configuration.
Keep in mind, if your machine is not heavy in specs, you should stick with the minimal configuration. A higher number of processors is not going to affect the performance of the virtual machine if your actual host machine is not capable of giving those resources.
You can have two processors even if your host computer only has one. This configuration is separate from your host configuration. This does not mean you can have an infinite number of processors and an infinite number of cores. If you choose more than is required, the virtual machine might misbehave, or it can affect performance in a negative way.
Virtual Machine Memory Configuration
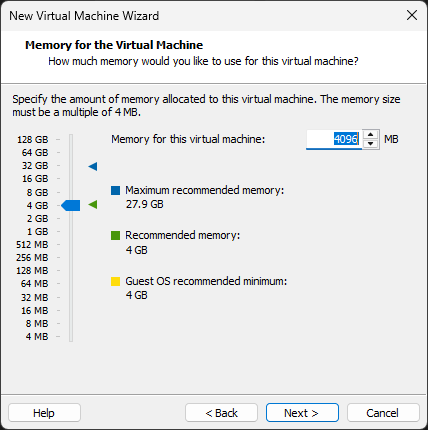
After setting up the CPU configuration, you will be asked for the memory allotment. What I usually do is, I select the minimum amount of RAM required for each virtual machine. For example, if I am installing a virtual machine of Kali Linux, I will allocate 2GB of RAM, while installing a Windows Server, I will allot it 4 to 8GB of RAM, as it is quite heavy on the resources.
In case you are getting a little confused in assigning the memory for your virtual machine, below is my personal way of allocating the memory based on the operating system I am creating the virtual machine of.
| Operating System | Memory Allotment |
|---|---|
| Windows server | 4 to 8GB |
| Windows 11 | 4 to 6GB |
| Linux | 2 to 4GB |
Virtual Machine Network Configuration
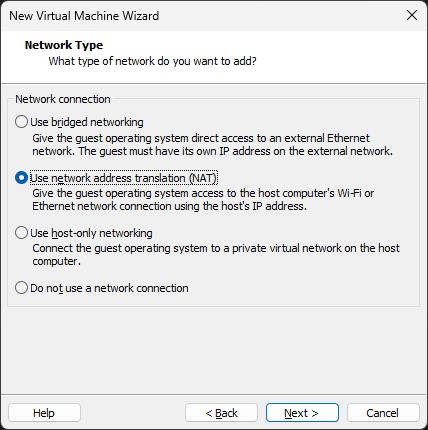
Now we’re going to assign a network to our virtual machine. In the world of virtualization, networking can be done in multiple ways. The three methods of networking shown in the above image work very differently from each other. We will see the use cases of each of them individually.
- Bridge Mode: In this mode, the virtual machine directly connects to the network adapter. This means it is going to take all of the networking configuration similar to your host machine and behave just the same in terms of networking. Therefore, the virtual machine is going to have a new IP address, DNS configuration, etc., allotted to it by your DHCP server (most probably your home router 😊).
- NAT Mode: The virtual machine will not be accessing the network adapter in this configuration; instead, the network configuration is going to be translated using a NAT table. This means the virtual machine can have a different IP configuration compared to the host machine.
- Host-Only Mode: This mode doesn’t let the virtual machine access the network adapter, and all of the network configuration is done within the host machine itself. You will have to set up the network inside the VMware settings for proper functioning and internet access.
If you are new, just go with the NAT mode. It’s easy, you don’t have to set up anything on your own, IP configuration will be done automatically, and let’s just say it’s the way to go when you create any virtual machine.
Just for you, my friend, I have shared the table below. You can go through it, and it is going to give a comprehensive understanding of each mode, why it is used, and where you should use it:
| Feature | Bridged Mode | NAT Mode (Network Address Translation) | Host-Only Mode |
| How it Connects | Connects directly to the physical network (bypassing the host). | Connects to a private network, sharing the Host’s IP address. | Connects to a private network isolated completely inside the host. |
| IP Address Source | Gets a unique IP from your physical router (e.g., your home WiFi router). | Gets an internal IP from VMware’s virtual DHCP server. | Gets a private IP from VMware (usually in a specific range like 192.168.x.x). |
| Internet Access | Yes (Direct access). | Yes (Through the Host). | No (Unless you install a proxy/router software on the Host) or set up network configuration manually. |
| Network Visibility | Visible: Other devices on your LAN can see and ping this VM. | Hidden: Outside devices cannot see the VM, but the VM can see outside. | Hidden: Completely invisible to the outside world. |
| Risk Level | Higher: The VM is fully exposed to the network (and potential threats). | Medium/Low: The VM is protected behind the Host’s NAT firewall. | Lowest: The VM is air-gapped from the internet. |
| Best Use Case | Running a web server, simulating a real physical computer, or when the VM needs to talk to other physical devices. | General use, web browsing, downloading updates, or when you move between different WiFi networks often. | Malware analysis, testing viruses safely, or setting up a secure private lab (like an Active Directory lab). |
I/O Controller and Disk Type
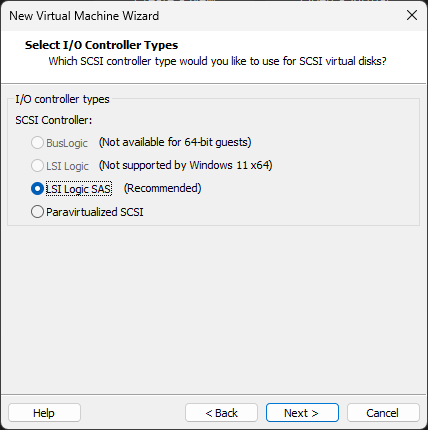
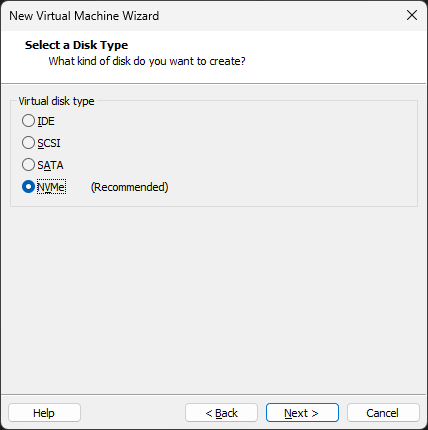
After you select the type of network you want for your virtual machine, you will be asked to select the input/output controller and disk type. You can just leave it on the recommended settings because we don’t have to worry about all this stuff.
Setting up Virtual Disk
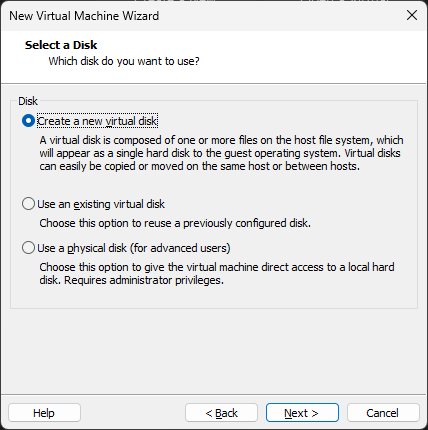
Here comes the setting that you should be worried about. Okay, let’s understand these things first. Since your operating system is going to be installed virtually in a virtual machine, you need to set up a virtual disk. It’s the same as having a hard disk installed on your computer. Let’s talk about the three options that you see in the image:
- Create a new virtual disk: This option is going to create a new virtual disk file for your virtual machine. It’s like having a brand-new hard disk being installed on your computer (virtually, obviously 😂).
- Use an existing virtual disk: This option is for reusing a previous virtual disk that you might have on your system. Nothing that we have to worry about because it is your first virtual machine.
- Use a physical disk: You should not choose this option unless you know exactly what you want to do. What this option does is, it allocates an actual hard disk present on your host machine as a new hard disk for the virtual machine that you are creating.
We will just create a new virtual disk because that’s the straightforward thing that any sane person can do, and should do.

We have created a virtual disk for our virtual machine; now we are going to configure this virtual disk. In the above dialogue box, you see the maximum disk size. You can adjust it to whatever you want, but I recommend having it set to 60GB, because that’s an appropriate size for a virtual disk even if you want to install some heavy stuff on it.
Now, if you do not alter any settings and leave it as it is and just configure the maximum disk size, that is enough!! VMware is going to allocate storage on the fly. This means if your virtual machine is consuming around 20GB of disk space, then it is going to take only 20GB from your actual hard disk present in your host machine.
Make sure that you don’t select the option of allocating all disk space now, because it is going to reserve the specified storage space right while creating the virtual machine.
The rest of the two options are for splitting the virtual disk into multiple parts or having a single virtual disk file.
Splitting virtual disk into multiple files:The virtual hard disk that is going to be created will have multiple files. This is generally recommended and does not affect the performance at all.
Store virtual disk as a single file:If you choose the option to store the virtual disk as a single file, a single virtual disk file is going to be created and stored on the host machine.
Personally I would recommend you to go with splitting the virtual disc into multiple files because I have seen a little performance issue when setting up the disk as a single file.
Naming your Virtual Disk
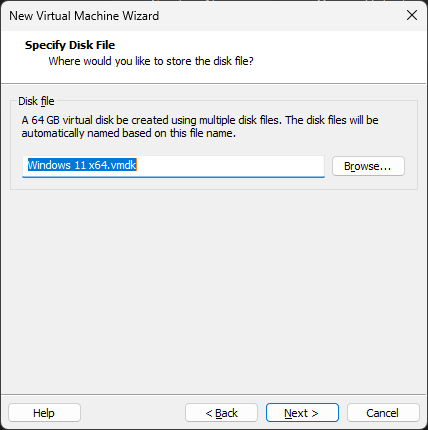
We have set up everything in our virtual machine,the only thing left is naming the virtual disk file. Name the virtual disk whatever you want, and Just Click next.
Finishing Up
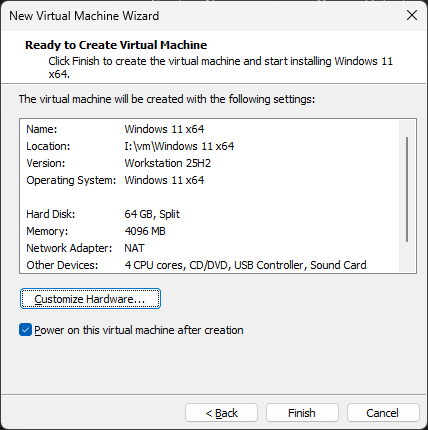
Well done, dude !! You have successfully set up the virtual machine. Now all you have to do is click on finish and your virtual machine is good to go.
If it does not work, then try to create the virtual machine again, but make sure to remove the previous virtual machine from your hard disk. For deleting the virtual machine completely from your host, you will have to go to the installation directory which you mentioned in the above steps and delete the virtual machine folder entirely.