
Hello everyone, in this blog post, we are going to see how we can install the Wazuh server with all its three components on a small Raspberry Pi. Yes, you heard that right. We can install the entire Wazuh server on our small Raspberry Pi, and you don’t even need an 8 GB version of Raspberry Pi; you can start with the 4GB version.
In the official documentation of the Wazuh server, it says you need at least 8GB of RAM to run the Wazuh server and a far better CPU than a Raspberry Pi, but still, you can install the Wazuh server without any problem if you have a small number of agents running.
Will the Wazuh Server run on a Raspberry Pi?
Well, if we see the official documentation of the Wazuh server, you will see that it requires a far better CPU and RAM compared to our small Raspberry Pi. But that is for 1-25 agents. If you are running a small number of agents, let’s say in your home, there are two or three devices, and you want to monitor those devices, you can go with a Raspberry Pi.
But if you are going beyond two to three devices or at Max 4, you should opt for better hardware and not use Raspberry Pi. OK, so now we have understood how much you can push the limits of our little buddy, so we’ll start with the installation steps.
Prerequisites
Before we start the installation process, you will need the following:
- Raspberry Pi at least a 4GB model.
- A high-speed SD card.
- An SD card reader.
- Raspberry Pi imager: Download from here:- Raspberry Pi software – Raspberry Pi
- A LAN cable for Internet access ( optional )
So, these are all the things that we need. I would highly recommend you to use a LAN to connect your Raspberry Pi to the Internet or your local network. I have tried Wi-Fi, but it’s not that great, and you will get some performance loss even if you set it up correctly.
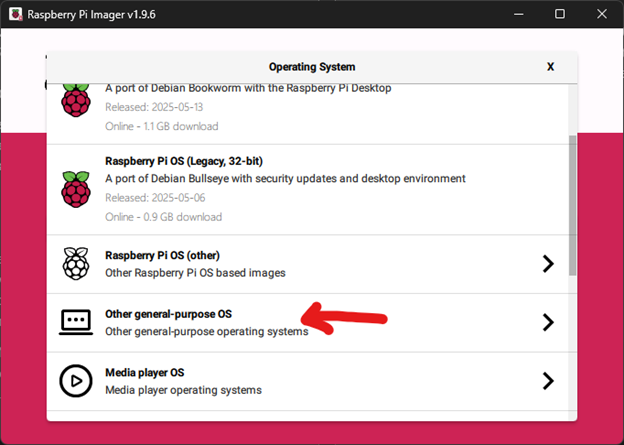
Flashing the SD card
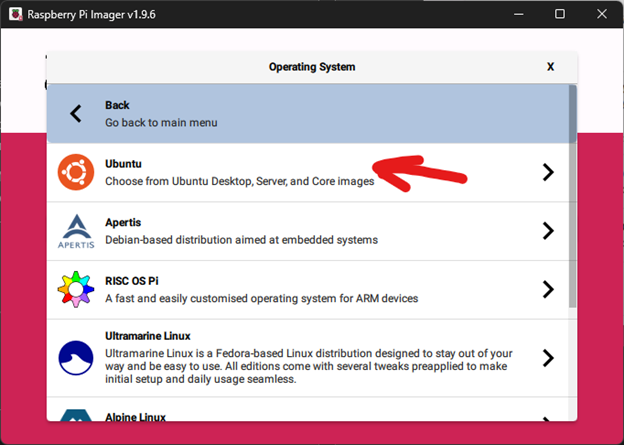
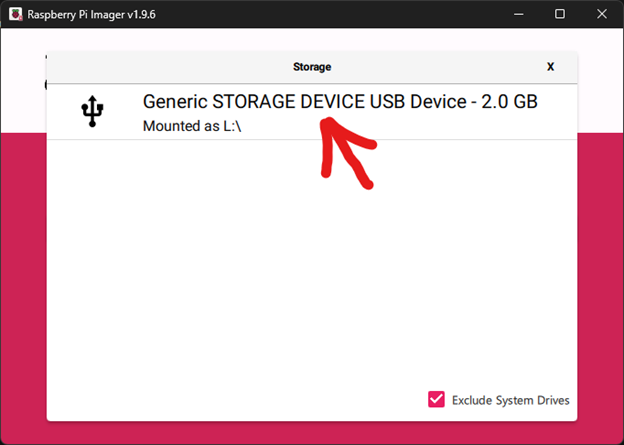
The first step of installation is flashing the SD card. For this, you will need the Raspberry Pi Imager and SD card reader. Insert your SD card into the SD card reader and hook it up to your computer. Now, after you detect your SD card on your computer, you will need the Raspberry Pi imager to flash the SD card.
I’m going to use the Ubuntu 24.04.3 LTS version since it is the latest one with long-term support. I’m going to install the Ubuntu server, not the Ubuntu desktop, because the Ubuntu server is really optimised for running 24/7. Whereas the desktop is just resource-consuming, and we don’t need the desktop anyway.
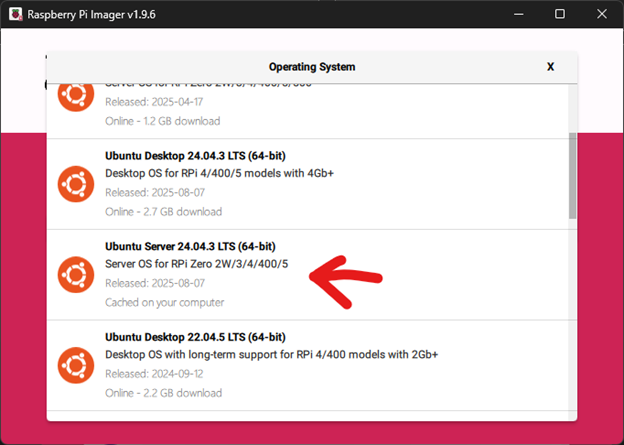
Don’t worry, I have not flashed the 2GB SD card. Actually the my high-speed card is already in my Raspberry Pi, and I don’t have any other card, so for this blog I’m going to show you how you can do the installation with this card. I will just assume you are not using the 2GB SD card, as it is not recommended. You should use at least a 32GB SD card with UHS1 OR UHS2.
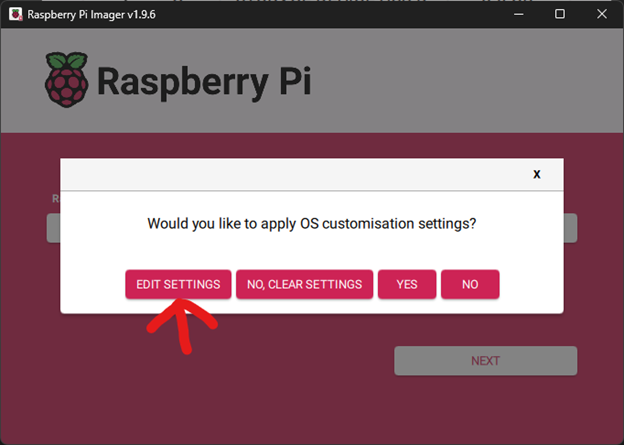
After selecting your card, you should click next , and then you will find this edit settings option. We will edit the settings as we flash the SD card because we will need SSH access to our Raspberry Pi.
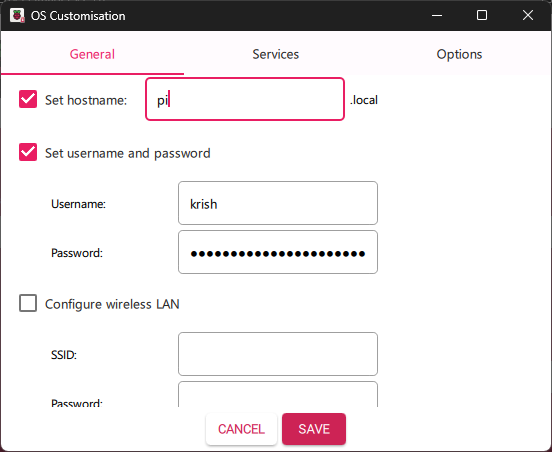
In the general tab, you can set up your username and password and your wireless LAN configuration if you are using Wi-Fi, but in this tutorial, I’m going to use the Ethernet cable for connectivity, so I will not set up the wireless LAN.
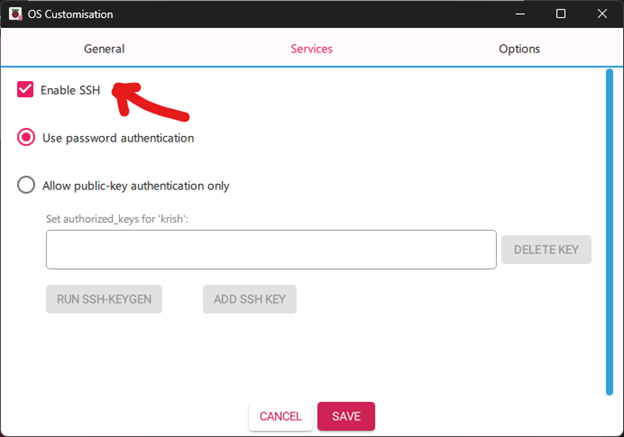
In the service tab, make sure you have enabled SSH and are using a password as authentication. Since I don’t want to make this tutorial very complicated, I am not going to use the SSH keys for this tutorial. I will just stick to the password, but you can also try the SSH keys for logging in; it is more secure, but for now, let’s just stick with our password.
Note for logging in to SSH you will just use the same password that you created on the general tab when you are configuring your username and password.
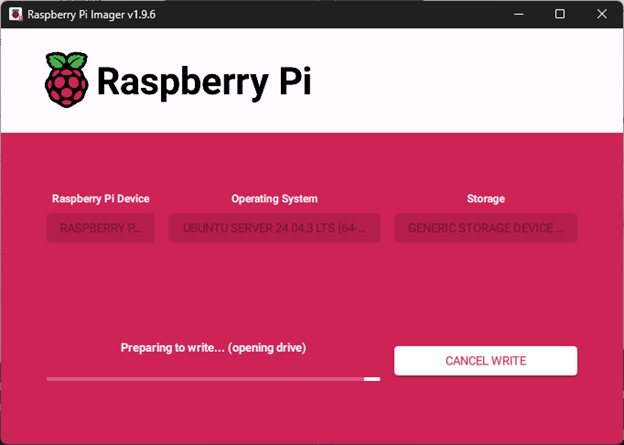
So if you have followed the steps correctly, now your SD card should start getting flashed.
Logging in to our Raspberry Pi
After flashing the SD card with the Ubuntu server, you will need to insert your SD card into the Raspberry Pi. Give our little monster a little power and plug in an HDMI. Now you should see some CLI stuff going on in your screen. After that, you will be asked to log in with your username and password.
Well, you don’t need the HDMI cable or a monitor necessarily, but I will highly recommend it if you are not technical with networking, IP addresses and SSH configuration if you know how to log in with SSH you can just go on with it else it is much easier to use a monitor.
Now, if you are using SSH or you have connected a monitor to your Raspberry Pi, you will have to insert the username and password that you have created in the general tab when we were flashing over SD card.
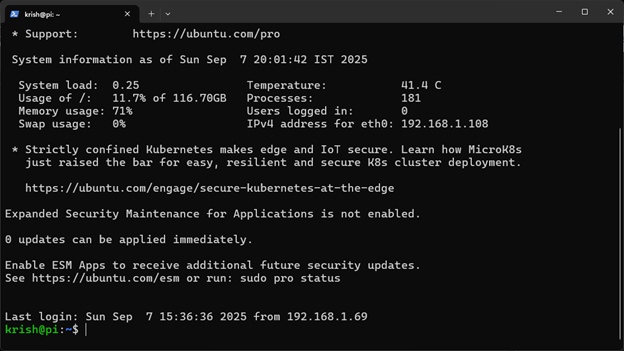
In the above terminal, you can see I have used SSH for logging into my Raspberry Pi with the user that I created when I was flashing the SD card.
Now, assuming that you have successfully logged in to your Raspberry Pi, we will move on to the next step.
Installing the Wazuh server
So this part is really simple, we will just have to run some commands to get started, and then we will start the installation of the Wazuh server.
sudo su
# Enter you password
apt update && apt-get update && apt upgrade -y
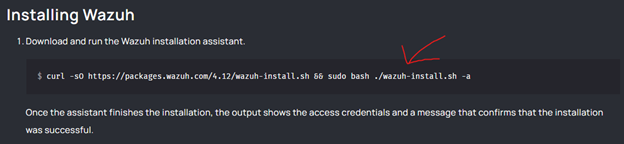
After the above command finishes, we will start installing our Wazuh server.
curl -sO https://packages.wazuh.com/4.12/wazuh-install.sh && sudo bash ./wazuh-install.sh -a
You will have to run the above command, and trust me, it is going to take a lot of time because it is going to install all three components of the Wazuh server, that is, the indexer, manager and dashboard.
Note that if you are following this tutorial in future there will be new Wazuh version, so I suggest you visit Quickstart · Wazuh documentation and copy the command that looks similar to the above one and just run it. The command should look like this 👇
INFO: --- Summary ---

INFO: You can access the web interface https://192.168.1.108/

    User: admin

    Password: 0asdfiioh#ophp?oashdfn544asdf

INFO: Installation finished.After the installation is finished, you will see a summary, which will include your username and password. Carefully store the password somewhere because the password is going to be a really long string, and if you lose it, you will not be able to access the dashboard.
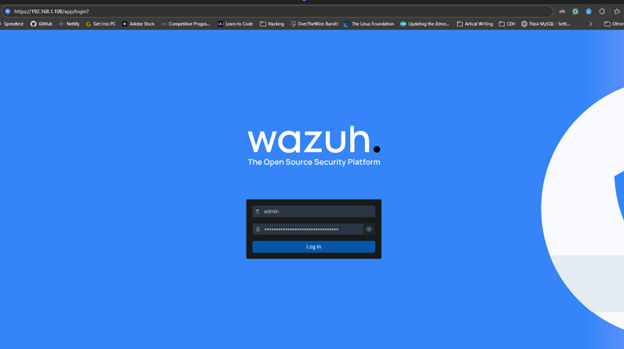
You will also see the web interface, which you can open on any other computer to access the dashboard. In the above summary, we can see our web interface is at https://192.168.1.108/ .
Accessing the Wazuh dashboard
So, if you have followed the tutorial correctly, your Wazuh server will be installed on your Raspberry Pi. Now all we need to do is navigate to our Wazuh dashboard, log in with our username and password and yyeyeye, the setup is complete.
For that, you will just visit the IP address of your Raspberry Pi ( make sure to use HTTPS ) on a browser. Well, that is it. Now you will have a Wazuh Server up and running. Now you can go ahead and add some agents and do whatever you want.
Bye Bye 👋.